The below documents my configuration of a Tripp Lite OMNI1000LCD USB UPS to communicate with Gentoo Linux (2.6.17-gentoo-r8 kernel) in my home network using NUT (Network UPS Tools). Note this is much easier in Dec 2007 - see new howto here
Plugged into the UPS :
(1) Linux Server (Older machine with AMD XP processor)
(2) D-Link DI-724GU Router
(3) Comcast Cable modem (Motorola SB5120)
(4) Vontage Phone Adapter (Motorola VT1005V)
(5) Oregon Scientific WMR-968 Weather Station
The average draw of those components is around 125 Watts (you have a Kill-A-Watt device don't you? Kill-A-Watt link). During my two simulated power outages it appeared that this UPS would power those components for ~30 minutes.
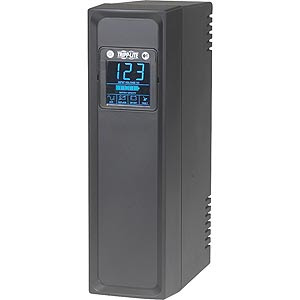
This UPS was purchased at Costco, so with that ease of distribution I suspect there might be more of you out there that may want to do this, so I'll write down my steps of configuration for Linux/Gentoo. Truth be told, maybe the key feature of the UPS verses others? The pretty Blue LCD display panel; even my wife attests to it aesthetic value.
Configuration took the better part of a day because, I didn't realize/admit the 2.0.4 version of NUT didn't support my Tripp Lite USB UPS. Once I use the development tree of NUT it was much easier. I hope to save you that time.
1. Ensure your kernel has hid support compiled into it
- in 'make menuconfig' select the '/dev/hiddev raw HID device support'
Device Drivers --->
USB support --->
<*> Support for Host-side USB
[*] HID input layer support
[ ] Force feedback support (EXPERIMENTAL)
[*] /dev/hiddev raw HID device support
2. emerge 'sys-power/nut'
Guess what? This, as of January 1, 2007, does not have the support in it for the Tripp Lite USB models (nut 2.0.4-r1 in portage). Following this, you will have to fetch the development trunk from the fine people on the NUT development team and create a Portage overlay. From this trunk, it runs great. I spent significant time starting the newhidups driver with the response No matching USB/HID UPS found and it appears 20 googles. It just doesn't work ;)
Note: Everything I know about Portage overlays I learned while watching a 'Cold Case' episode, so it isn't too hard. Kudos to portage.
3. Get the development trunk from Subversion. Don't have subversion in Gentoo? Me neither, but a simple 'emerge subversion', got me a running version.
mkdir ~/src/nut
cd ~/src/nut
svn co svn://svn.debian.org/nut/trunk
This will get the latest source for nut in a directory called trunk in your home directory ~/src/nut
4. Create a Portage Overlay for the development trunk source.
We will want to do this so that portage knows what we are up-to. Admittedly you can go straight for the compilation of the nut source and figure out all the configuration necessary to get it to run in Gentoo, but it was already all figured out for sys-power/nut-2.0.4.r1 so lets use that.
References:
HOWTO Create an Updated Ebuild
HOWTO Install 3rd Party Ebuilds (slightly less relevant in our case.)
a. Package the source:
in dir ~/src/nut
cp -r trunk nut-2.1.0
note: we are making up a nut version that follows the portage convention.
tar -cf nut-2.1.0.tar nut-2.1.0
gzip nut-2.1.0.tar
b. copy the source into the portage distribution tree
cp nut-2.1.0.tar.gz /usr/portage/distfiles/
c. Create an overlay directory and add it to your make.conf (I am presuming you have root like powers aren't I? Keep this in mind)
mkdir -p /usr/local/portage && echo 'PORTDIR_OVERLAY="/usr/local/portage"' >> /etc/make.conf
d. copy the existing ebuild for nut into your new Portage Overlay directory
make the dir: mkdir -p /usr/local/portage/sys-power/nut
copy it: cp -r /usr/portage/sys-power/nut /usr/local/portage/sys-power/nut
e. create the new ebuild file (copying from the latest ebuild).
cd /usr/local/portage/sys-power/nut
cp nut-2.0.4-r1.ebuild nut-2.1.0.ebuild
note: remember to name this the same as tar file above.
f. remove the ebuilds you don't need (I like clean)
for me it was: rm nut-2.0*
g. edit the ebuild. I removed a patch that probably isn't necessary in the development trunk.
nano -w /usr/local/portage/sys-power/nut/nut-2.1.0.ebuild
I removed line 46 that started with 'epatch'
5. Manually step thru the emerge steps with ebuild (slow and cautious). Ebuild is a lower level tool that emerge uses.
Note: I am only going to compile the driver I need, it isn't a default driver so I need to use the NUT_DRIVERS directive to ebuild system. Additionally when I didn't do this, one of the drivers in the development tree had a compile time error.
a. The digest:
NUT_DRIVERS="newhidups" ebuild /usr/local/portage/sys-power/nut/nut-2.1.0.ebuild digest
b. The unpacking (the unzips the tar file you created earlier):
NUT_DRIVERS="newhidups" ebuild /usr/local/portage/category/program/program-version.ebuild unpack
c. The compile
NUT_DRIVERS="newhidups" ebuild /usr/local/portage/category/program/program-version.ebuild compile
d. The installation
NUT_DRIVERS="newhidups" ebuild /usr/local/portage/category/program/program-version.ebuild install
Without the NUT_DRIVERS declaration I got:
/bin/sh ../libtool --tag=CC --mode=link i686-pc-linux-gnu-gcc -I../include -O2 -march=athlon-xp -pipe -Wall -Wsign-compare -o blazer blazer.o ../common/libcommon.a ../common/upsconf.o
../common/parseconf.o
../common/state.o main.o dstate.o serial.o
i686-pc-linux-gnu-gcc -I../include -O2 -march=athlon-xp -pipe -Wall -Wsign-compare -o blazer blazer.o ../common/upsconf.o ../common/parseconf.o
../common/state.o main.o dstate.o serial.o ../common/libcommon.a
if i686-pc-linux-gnu-gcc -DHAVE_CONFIG_H -I. -I. -I../include -I../include -O2 -march=athlon-xp -pipe -Wall -Wsign-compare -MT cpsups.o -MD -MP -MF ".deps/cpsups.Tpo" -c -o cpsups.o cpsups.c; \
then mv -f ".deps/cpsups.Tpo" ".deps/cpsups.Po"; else rm -f ".deps/cpsups.Tpo"; exit 1; fi
cpsups.c: In function 'clr_cps_serial':
cpsups.c:110: error: 'TIOCM_DTR' undeclared (first use in this function)
cpsups.c:110: error: (Each undeclared identifier is reported only once
cpsups.c :110: error: for each function it appears in.)
cpsups.c:112: warning: implicit declaration of function 'ioctl'
cpsups.c:112: error: 'TIOCMBIC' undeclared (first use in this function)
cpsups.c: In function 'set_cps_serial':
cpsups.c:117: error: 'TIOCM_DTR' undeclared (first use in this function)
cpsups.c:119: error: 'TIOCMBIS' undeclared (first use in this function)
6. Configure NUT
Now that we've made this build, you can follow the steps at the wiki:
Gentoo HOWTO NUT (Network UPS Tools)
You'll get to start after the Install Software section. Yes, you'll need the newhidups driver. I am pasting in the article with a couple of mods for my UPS posterity/consistency.
I added the bit about adding a MONITOR line to uspmon.conf. This is necessary for upsmon to work
Configuring
Go to /etc/nut . Open ups.conf. Add to this file every UPS you want to monitor. Mine looks like this:
# [powerware]
# driver = bcmxcp
# port = /dev/ttyS0
# desc = "Server, adsl, 3com"
Change the values to something that fit's your configuration better and save. If you have a USB connection to your UPS, your entry might look like
[OMNI1000]
driver = newhidups
port = auto
desc = "Tripp Lite OMNI1000LCD USB"
Open upsd.conf. This file contains access-policy to the UPS's you have.
To only allow the same computer to connect to them, the file should look like this:
ACL all 0.0.0.0/0
ACL localhost 127.0.0.1
ACCEPT localhost
REJECT all
The ACL-lines are used to add hosts. The syntax is ACL name IP. If the name is placed after ACCEPT connections from there are accepted, if it's placed under REJECT, connections are rejected. This sort of reminds me of a hosts.allow file?
Next open upsd.users. This file contains accounts for users who can make modifications. The following line grants access to the user server to everything. This isn't integrated with particular logins from my observation. So you can make-up a new user/pass and run with that. The only place one needs to remember this if you are setting properties through NUT on the UPS.
[server]
password = changeme
allowfrom = localhost
actions = SET
instcmds = ALL
upsmon master
Next take a look at upsmon.conf. This is the UPS Monitor configuration. A scan through this file is going to answer more questions than me writing about it. It is pretty simple, but the below three changes are all I needed to make.
- in Gentoo we compiled the nut package using the 'nut' user, so ensure this is in there.
RUN_AS_USER nut - The UPS to monitor
MONITOR OMNI1000@localhost 1 server changeme master - for those of us with a measly single UPS for our home network you'll need this line:
MINSUPPLIES 1
Next if you want look at upssched.conf too, it may be interesting if you want to schedule events. This will be useful if you want to automate something like "30 seconds after the power is out, send an email via SMTP." I currently am not interested in this
Finishing
Now, start the upsd and upsmon service:
/etc/init.d/upsd start /etc/init.d/upsmon startThis should identify if there is some still wrong.
If nothing is wrong add them to the default runlevel
rc-update add upsd default rc-update add upsmon defaultIf you didn't get any error when you started the services you seemed to configure it right. Else, have a look at the error output and think what might be wrong. One error I got was the permissions of the serialport, which is easy fixed with adding nut to the tty-group.
Testing
You'll be using tools upsc and upscmd
Test upsc and see if your UPS replies:
upsc yourupsname@yourupshost ups.status
specifically:
upsc OMNI1000@localhost ups.statusIf you get "OL" (On Line) everything is working good (if it is on the line and not battery).
To see every command your UPS supports, type
upscmd -l OMNI1000@localhostA full status looks like the below.
#upsc OMNI1000@localhostbattery.charge: 100battery.type: PbAcbattery.voltage: 13.4battery.voltage.nominal: 12.0driver.name: newhidupsdriver.parameter.port: autodriver.version: 2.1.0driver.version.data: TrippLite HID 0.1 (experimental)driver.version.internal: 0.30input.frequency: 59.8input.voltage: 117.5input.voltage.nominal: 120output.frequency.nominal: 60output.voltage.nominal: 120ups.beeper.status: enabledups.delay.reboot: 65535ups.delay.shutdown: 65535ups.mfr: Tripp Liteups.model: TRIPP LITE UPSups.power.nominal: 1000ups.serial: 692195 Bups.status: OL CHRG7. Customization of and understanding UPSMON.It is upsmon that will be responsible for a system shutdown when the battery level reaches a critical level. It is here that if you want to do magic like emails/etc, you'll want to look.
There you have it in 7 easy (or not so easy?) steps, it should be configured.
UPS/NUT References that will help.
Network UPS Tools Home Nut-upsuser Mailing List Note: from my lurking on this mailing list, it is filled with people very helpful and with an abundance of experience with NUT.
Keywords: Tripp Lite, USB UPS, Tripp Lite Gentoo, Tripp Lite OMNI1000LCD, USB HID UPS Linux, Gentoo HID UPS, gentoo NUT portage overlay, Gentoo UPS NUT, Tripp Lite Linux, Tripp Lite OMNI1000LCD Gentoo, Tripp Lite OMNI1000LCD Linux, Tripp Lite OMNI1000LCD UPS.